반응형
이번 포스팅에서 ResNet pre-trained model을 불러오도록 하겠습니다.
pre-trained model 불러오기
작업환경은 google colab에서 진행했습니다.
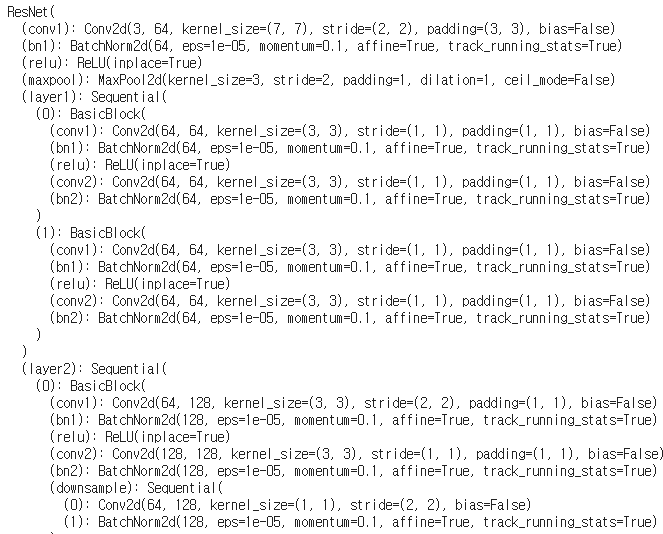
1. pre-trained model을 불러옵니다.
# load resnet18 with the pre-trained weights
from torchvision import models
import torch

resnet18_pretrained = models.resnet18(pretrained=True)

print(resnet18_pretrained)

2. output layer를 현재 data에 맞게 수정합니다.
# change the output layer to 10 classes
num_classes = 10
num_ftrs = resnet18_pretrained.fc.in_features
resnet18_pretrained.fc = nn.Linear(num_ftrs, num_classes)

device = torch.device('cuda:0')
resnet18_pretrained.to(device)
3. 모델 요약본을 출력하여 잘 불러왔는지 확인해보겠습니다.
# get the model summary
from torchsummary import summary
summary(resnet18_pretrained, input_size=(3, 224, 224), device=device.type)

4. 첫 번째 레이어의 가중치를 시각화하여 확인해보겠습니다.
# visualize the filters of the first CNN layer
for w in resnet18_pretrained.parameters():
    w = w.data.cpu()
    print(w.shape)
    break

# normalize weights
min_w = torch.min(w)
w1 = (-1/(2 * min_w)) * w + 0.5

# make grid to display it
grid_size = len(w1)
x_grid = [w1[i] for i in range(grid_size)]
x_grid = utils.make_grid(x_grid, nrow=8, padding=1)

plt.figure(figsize=(10, 10))
show(x_grid)

일정한 규칙을 띄고 있는 것으로 보아 학습이 된 가중치인것을 확인할 수 있습니다!
이제, loss function, optimizer를 정의하고 이 모델로 학습을 진행하면 fine-tunning을 할 수 있습니다.
반응형
'Python > PyTorch 공부' 카테고리의 다른 글
| [PyTorch] 이미지 크기와 바운딩박스 좌표를 resize 하는 함수 정의 (0) | 2021.03.06 |
|---|---|
| [PyTorch] single object image 분석 (0) | 2021.03.06 |
| [PyTorch] 이미지 픽셀의 평균, 표준편차를 계산하여 정규화하기 (1) | 2021.02.28 |
| [PyTorch] dataset 분할하기 (2) | 2021.02.28 |
| [PyTorch] convolutional layer 출력 크기 계산하는 함수 만들기 (0) | 2021.02.22 |